Configure Conversation Context
Feature Overview
Before or during a conversation, you can use the toolbar to add context information, letting the AI answer based on specific data scope, business roles, and domain expertise.
Open the Toolbar
Click the + button at the bottom-left of the input box to open the toolbar menu.
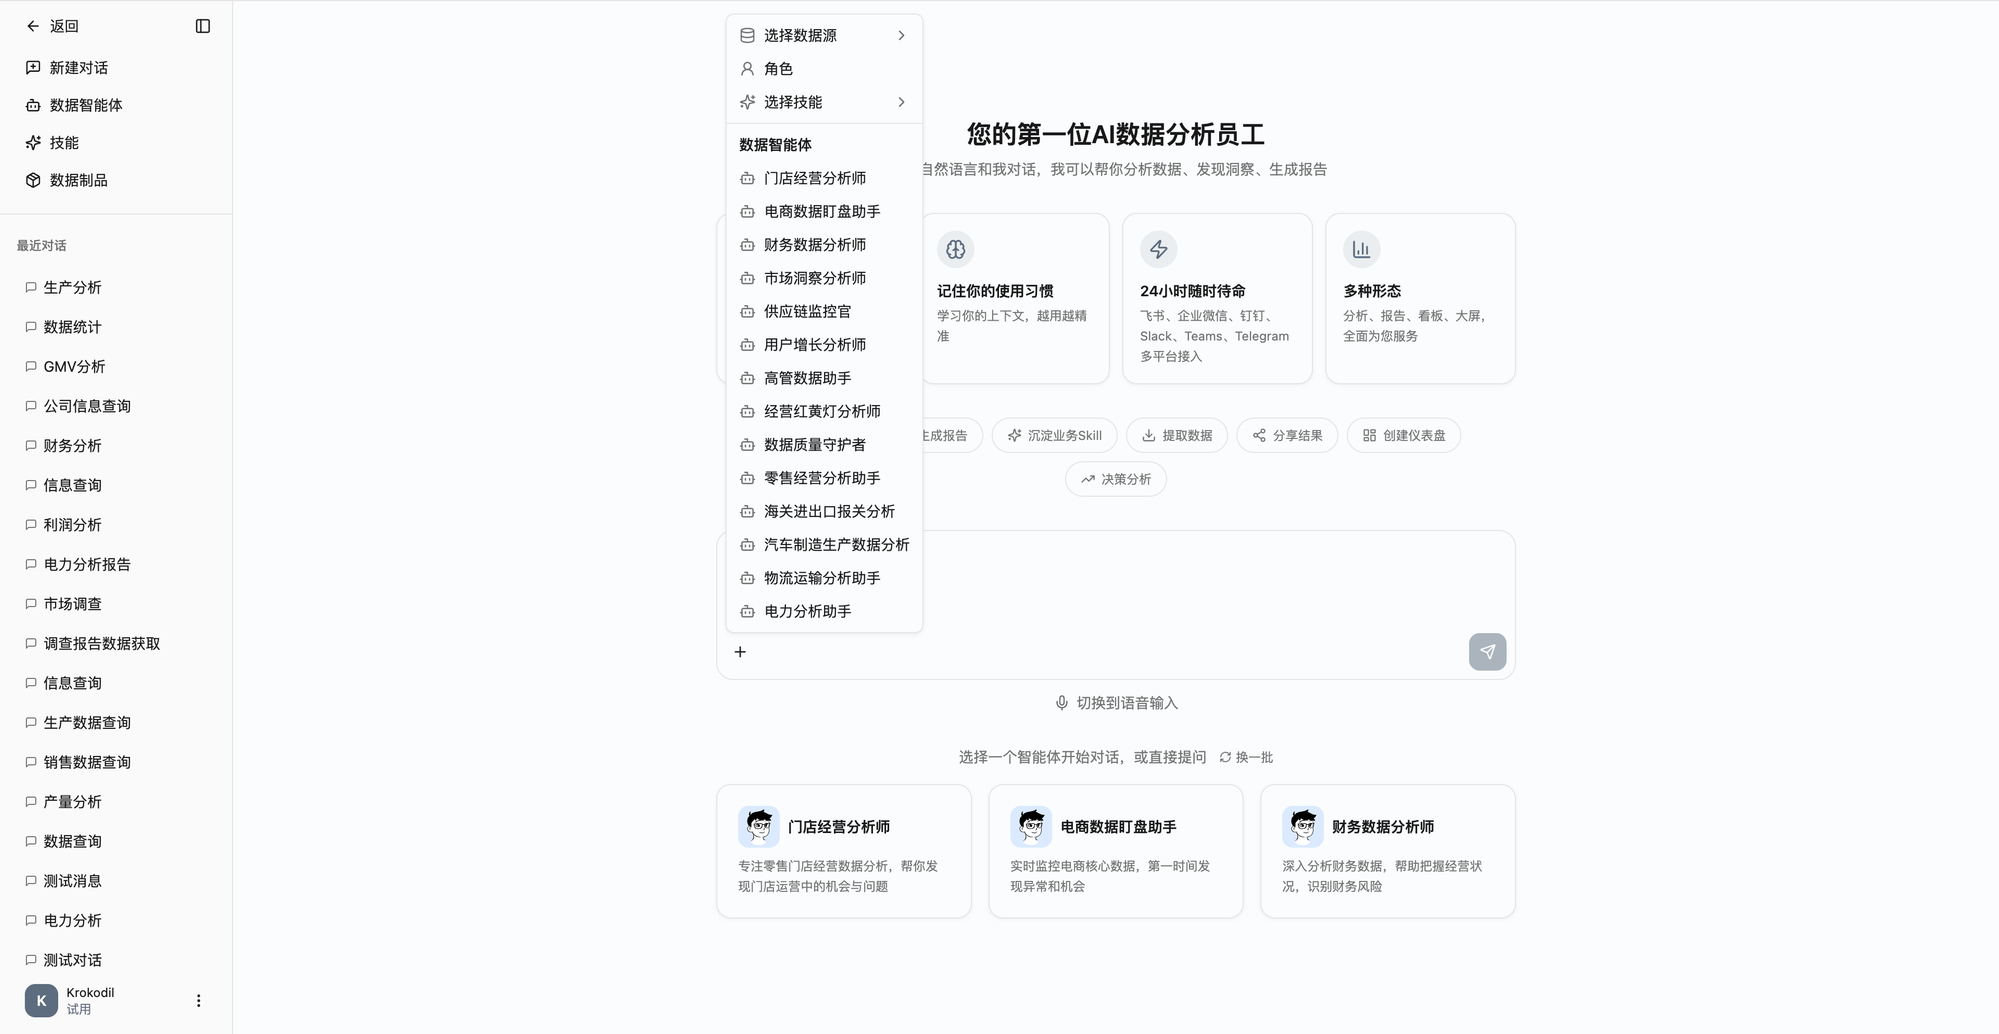
The toolbar menu contains four sections:
Select Data Source
Click [Select Data Source] to expand the data source list and check the ones you need. Multi-select is supported. If none are selected, all data sources are used by default.
Select Role
Click [Role] to open the role selection dialog and choose a preset analysis role. Roles come with specific business perspectives, data permissions, and output formats. Some roles require variable values (e.g., time range, department name) to be filled in; enter them in the dialog and confirm.
Select Skill
Click [Select Skill] to expand the skill list and check the ones you want to enable. Skills add extra analytical capabilities to the conversation, and multi-select is supported.
Data Agents
Data agents appear at the bottom of the menu. They are professional analysis assistants further specialized for specific business scenarios. Selecting an agent automatically links its configured data sources.
Selected Items Display
After selection, configured items appear as icon chips below the input box. Hover to see details, click to remove:
| Icon | Meaning |
|---|---|
| Database icon | Selected data source |
| User icon | Selected role |
| Sparkles icon | Selected skill |
| Bot icon | Selected data agent |
Notes
- When selecting a data agent, its configured data sources are auto-linked, and manually selected data sources are cleared
- Modifying configuration mid-conversation triggers a confirmation prompt; after confirmation, changes apply to a new conversation
- After switching roles, the current conversation context is preserved, and subsequent questions use the new role's configuration