Installation and Configuration of ATST
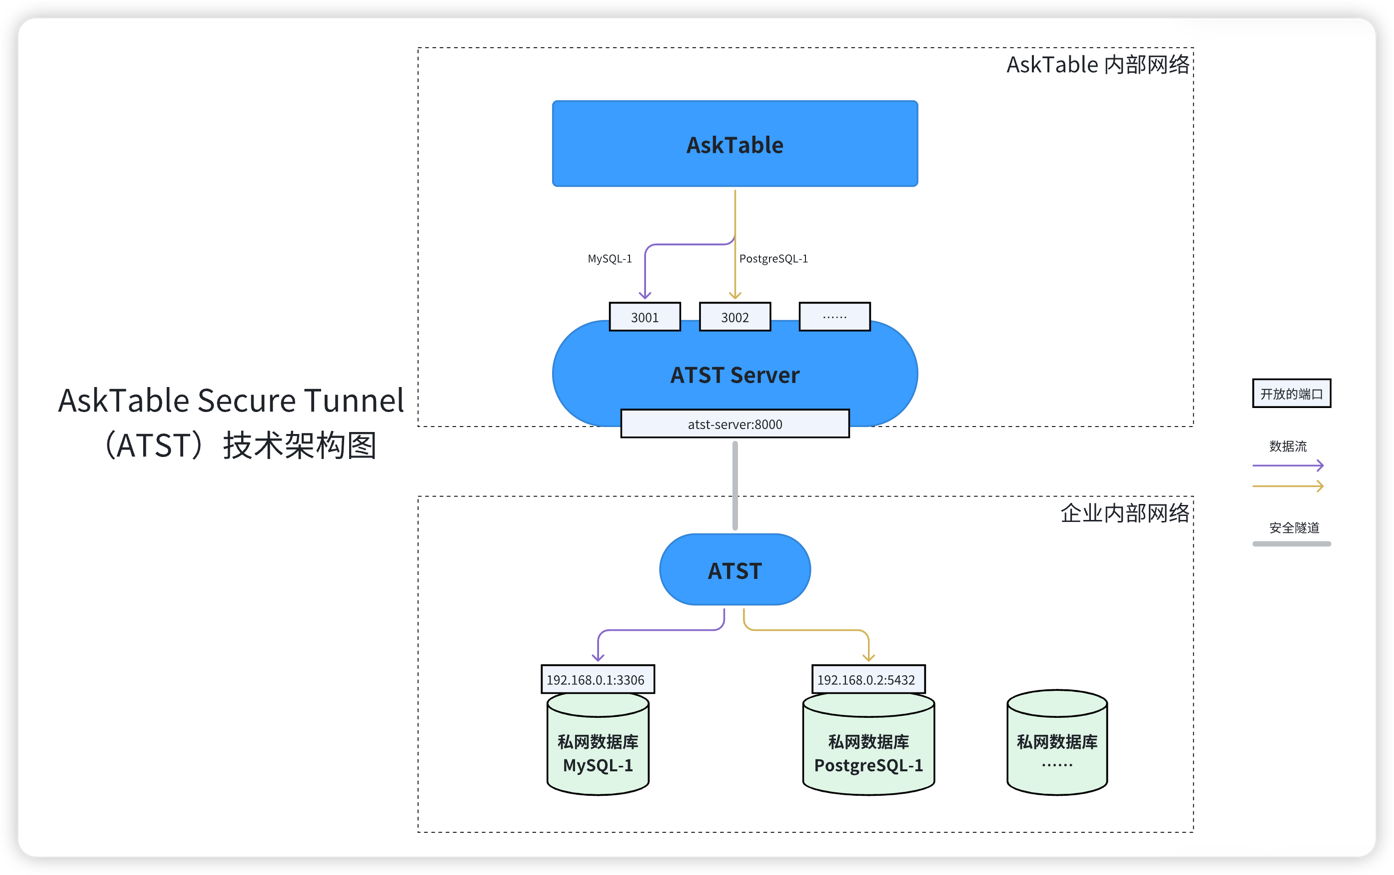
ATST Technical Architecture
In AskTable, the Secure Tunnel (ATST) serves as the bridge connecting an internal network database with AskTable. The ATST is deployed using Docker containers and authenticates using the API key provided by AskTable.
Before using the AskTable Secure Tunnel (ATST), you need to install and configure it. The following steps will guide you through the installation and configuration process.
Step 1: Obtain ATST
ATST is a Docker image that can be obtained from Docker Hub or the Alibaba Cloud Image Repository.
For Domestic Users
Use the following command to pull the ATST image from the Alibaba Cloud Image Repository:
docker pull registry.cn-shanghai.aliyuncs.com/datamini/asktable-secure-tunnel
For Overseas Users
Use the following command to pull the ATST image from Docker Hub:
docker pull datamini/asktable-secure-tunnel
Step 2: Configure ATST
Before starting the ATST container, you need to configure some environment variables:
API_KEY: Your AskTable API key.ATST_ID: The Secure Tunnel ID, which can be created in the AskTable management console.
Example Configuration
Here is an example configuration:
docker run -d -P \
  -e API_KEY=your_asktable_api_key \
  -e ATST_ID=your_atst_id \
  registry.cn-shanghai.aliyuncs.com/datamini/asktable-secure-tunnel
Step 3: Start ATST
Use the above configuration command to start the ATST container. Once started, ATST will automatically establish an encrypted tunnel, allowing AskTable to access the internal network database.
➜  $ docker run -d -P -e API_KEY=asktable_api_key -e ATST_ID=atst_1e9PisC2 registry.cn-shanghai.aliyuncs.com/datamini/asktable-secure-tunnel
Unable to find image 'registry.cn-shanghai.aliyuncs.com/datamini/asktable-secure-tunnel:latest' locally
latest: Pulling from datamini/asktable-secure-tunnel
91e301773f03: Already exists
15856ca26414: Already exists
30ed4c127913: Already exists
feb30c5ba2d1: Already exists
228270bb5dc5: Already exists
1270f6c33d66: Already exists
01f4847499fb: Already exists
b493cb19e676: Already exists
de4db47de1c7: Pull complete
06329ecaa692: Pull complete
8335aa3dfbc7: Pull complete
5a8ea1ca4e0c: Pull complete
f343dd1eff78: Pull complete
a9c07ae60c47: Pull complete
bb662d942789: Pull complete
Digest: sha256:d7b1a7003b9114e8c5cddb7750a88aeca874fc6d15bb17ede5b58e7624730489
Status: Downloaded newer image for registry.cn-shanghai.aliyuncs.com/datamini/asktable-secure-tunnel:latest
f2765dcf8eb9ff8deffead0a911d54b6048990bed563574768990033829f2ab0
➜  $ docker ps
CONTAINER ID   IMAGE                                                               COMMAND            CREATED         STATUS         PORTS                     NAMES
f2765dcf8eb9   registry.cn-shanghai.aliyuncs.com/datamini/asktable-secure-tunnel   "python main.py"   5 seconds ago   Up 4 seconds   0.0.0.0:55000->1260/tcp   inspiring_kapitsa
Check Container Status
Use the following command to check the container status:
docker ps
Ensure that the ATST container is running and in a normal state.
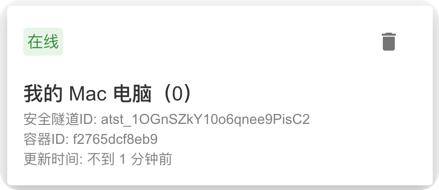
After starting ATST, you can see the ATST status in the AskTable management console.
With these steps, you have successfully installed and configured ATST. Next, you can register a data source and access it via the secure tunnel.